Thursday, May 24, 2012

More throw pillows

After my last pillows post, I got right on doing the ones for my bedroom. Our colors are many: black white and grey (neutrals) with pops of seafoam, orange and a mustard yellow here and there.

I have been working on some frames for a collage wall, I did some silhouettes in those colors and I also redid a lamp to match as well, but first I would like to share the pillows I did for the bed!

I bought the duvet cover (for a great price!) at Target. It's not what I originally set out for, but I love stripes and I loved how this was perfect for us. It just fits who we are. Then I added the different pillow designs to dress it up:


Here's some close ups of them:


The T pillow was done with my cutter, some freezer paper and fabric paint. 

I think my favorite part is that my great grandmother's petal pillow matches perfectly. Since that was the original pillow we had going in here, everything went off of that. Very special!


Pin It Pin It

Wednesday, May 23, 2012

Use your apple tv as a projector!

Plus, how to make any shape pinata you want!

My husband and I have been prepping for our son's 7th birthday party, and I put him in charge of the pinata. The theme for this party is "shark" and we knew we weren't interested in any of the pinatas we have been seeing around, so it was time to do a different design. The only problem was how to make it bigger than what our printer printed!

Here came his brilliant idea. Using the Apple Tv as a projector to project our image to trace into a bigger size. The only thing that limits you is the size of your tv!

Find the image you want to use. We did a google image search. After you click on the picture, then save the image "in full size" on your iphone, ipod, ipad, whatever it is you use with your apple tv. We used our iphones.

Then go to your photos wherever you keep them on the device you are using and click on the image.


Go to the bottom of the picture where the triangle is in the square and click on it:


select apple tv.

It should then project onto your tv. If you need to resize it, you can do that and resave it, or if you want it just a bit bigger, you can edit the image on your device by rotating it on its side and reprojecting it.

Then use a big piece of butcher paper and painter's tape and lightly trace the outline to make a pattern. Then trace onto whatever you are using. We used old boxes. Because we used old boxes and items on hand, this pinata cost only 4 dollars (for cost of tissue paper).

I dont have pictures of these steps, but after he cut out two of the sharks out of boxes, he then made little cardboard supports to help while we taped on the sides of the pinata to make it 3d. (Similiar to the mickey pinata where I used this tutorial)

Since the shark was blue, for the edges, we used painter's tape to finish the sides. But for the sides, we did the old school method of tissue paper squares twisted onto a pencil eraser and glued down individually. It took a VERY long time but I think it was worth it.


Because it took so long to make and because there are all different ages coming to the party, we decided to do a pull string pinata. Which will be great because the pinata can then be saved :) Directions for a pull string pinata can be found here.

I also used the projector method to make a giant number for the front door (you can kind of see the start of it hanging on the door behind my little guy modeling the shark for us).  This is going to become a birthday tradition :) We will keep each number white and change out a banner across the number for each child's turn.


(Sorry, all pictures were taken with my phone :))

Pin It Pin It

Wednesday, April 25, 2012

Decorative Throw Pillows


I sure do go in blogging spurts. It seems like I am on for awhile and then off for awhile. My middle will be starting kindergarten in the Fall, so I have been trying to enjoy every little bit that I have with him still as a "baby" at home.

Recently, we took a plunge and bought a new sectional for our living room. I wasn't too keen on getting a sectional, but I wanted it to still be something wipe-able like we had, and to match better than our previous couches did. My husband picked out the sectional, and then I decorated it with some "new" to us pillows.

I used previous pillows I had here, as well as three larger ones that my sister in law passed on to us. I picked up a sheet at the thrift store and a pillowcase, but everything else I had, I used here. I think this entire project cost me out of pocket 5 dollars at the very most because of using my resources and supplies.

I got a couple of ideas off of pinterest: Make it and Love It for the gathered pillow, an idea similar to this pillow at E Tells Tales, saw some great ideas with monogram and burlap too, but then after that, each one, I kind of made up as I went along. I wanted texture, ruffles, buttons, burlap, linen and paint. I did freezer paper stencil directly on the burlap, and vintage lace trim.


(Recognize the bird from my sister's bridal shower?)


(The T is freezer paper stenciled onto linen)


(Vintage lace trim, a rufflle pillow and a burlap pillow with two types of burlap ribbon and buttons sewn on)

On the back, I did the envelope type pillow cover, so they are also easy to remove and wash.


I love how they all coordinate together and make up something that reflects who we are as a family. (The ottoman is the one my husband and father in law built, my how our living room has changed!)

I love how the pillows are all different but still coordinate together. It seems like such a true reflection of our family.


Next up is my bedroom pillows! I spent a little more on the fabric for these, but I can not wait to get them all made up! 

Pin It Pin It

Thursday, April 12, 2012

little girl shorts

I am thinking of doing a tutorial for these. I think they are so cute paired with a coordinating top and there's so many ways to embellish them! My little one loves pockets, so I did two little pockets on the front.

Untitled

Untitled

If I did a tutorial, I would shorten the length a bit and the rise of the top of the shorts. And they really are all nice and straight and even, I just have a little wiggle worm that its impossible to take a picture of without everything looking like its sewn crooked! :)

Pin It Pin It

Wednesday, April 4, 2012

Tooth fairy pillow

jadens tooth missing

Our oldest lost his first tooth this morning while eating cereal. We knew it was coming, (I think it was loose for two weeks?) and so I had been looking for ideas for a tooth fairy pillow. Trying to find a microscopic tooth under a pillow with two boys who sleep super close together in loft beds just didnt seem too appealing to me.


After seeing so many super cute ideas on pinterest, I went ahead and sketched out a tooth freehand, cut two pieces out of felt, made a felt pocket from the mouth added eyes and cheeks and a ribbon to hang, then stuffed it and sewed it shut. He's excited for tonight, and I am excited to not have to tooth hunt in the dark hanging on a ladder!

Untitled

Why do kids have to grow up so fast?

jadens gap

Pin It Pin It

Tuesday, April 3, 2012

Newborn Frame

When I had my first baby, I was selling Stampin' Up! and big into paper crafts. I think paper crafting will always be my first love.

I had a very difficult labor that resulted in an emergency c-section with him. I was very out of it and at the time wasn't thinking clear enough to get those great pictures you see everywhere these days of people's newborns still in the hospital, not that I could have if I wanted to. He was definitely my most difficult birth, and it was hard on both of us.

So a month or so after I had him, I saw an idea in one of the many portrait studio ads we were being bombarded with, and thought, "hey, I could do that with one of our hospital photos!"  As I looked through our photos, I realized how few shots we got of our sweet baby boy. Of course, as new parents, we got a lot, but not exactly what I was needing.

The more I thought about it though, I came to the conclusion that the "quality of the picture" wasn't as important as the "memory" of the picture, resulting in this sweet picture of our baby boy, fresh into the world.


This was down with a Stampin' Up! hand print stamped on matboard. I then printed out his name and birth year on vellum and attached with black eyelets. I glued on his picture straight to the matboard and placed in the frame. 


Then when we had our second, I did the same, alternating the hand print. Now that we have three, I wish I had kept all of the hands going the same direction.


And then when we had our daughter, I did a pink hand, but everything else, including the font stayed the same.

The pictures might not be the most spectacular, but the events and the babies that they capture sure are!

Pin It Pin It

Monday, April 2, 2012

Ruffle Shower Curtain

Have you seen the adorable ruffle shower curtains all over pinterest? So many fun colors and ideas with them!

I thought I would make my own. Since I am more of an eyeballer and put into action kind of girl, I didn't do a tutorial or follow one, but here is a great one you can check out!

What I used:

  • I purchased 4-5 white sheets from the thrift store, about 10-12 dollars. I believe I used 3 of them.
  • Extra large grommets (I needed 12, they come in a pack of ten, so I bought the kit plus the refill, and its good to have some extras in case you mess one or two up. Guilty!)
  • LOTS of coordinating thread. A lot.
  • DEFINITELY recommend a shirring/gathering foot. I do not recommend a ruffler foot on this project. After spending an hour in frustration, I realized the fabric as just too thick for the ruffler foot and got out my gathering one. Brilliantly easier. 
Another tip, draw on your lines onto your base where you are sewing your ruffles on. I also assembly line all the steps, it makes it go much smoother.

My bathroom in our room is on the small side, and we have a curved shower rod that needs to be rehung, but I was really happy with how straight they were sewn on and how much brighter it is in the bathroom (there was red before).


and some phone pictures of it at night:


Pin It Pin It

Friday, March 30, 2012

Flash Back Friday: DIY Bird Feeder

Where have I been lately? Every since this guy turned 5, it seems like everything has been super busy around here!


a super simple DIY Bird Feeder you can do with your little ones.


Pin It Pin It

Thursday, March 29, 2012

Do you swagbucks?

Search & Win

Do you use swagbucks to search the internet? I love it. I don't use it super hardcore like some people do but I still earn amazon gift cards every couple of months. Can't beat free gift cards just for searching the web!

If you are interested, click the link above so that I can refer you :) Its easy to set it up and its fun to spend the rewards!


Pin It Pin It

Sunday, March 18, 2012

a St Louis Cardinals Baseball Birthday

It was quite an adventure…this birthday party of his. He requested the theme back in December, at Ellie’s birthday party, because they ALWAYS pick their birthday theme at each party, of course!
I worked on it here and there all month, ordered everything ahead of time, bought the balloons and even bought the cake. We were all ready to go Friday night, when the dreaded happened. 12:30 in the morning brought Jackson a stomach bug that lasted all day the next day.
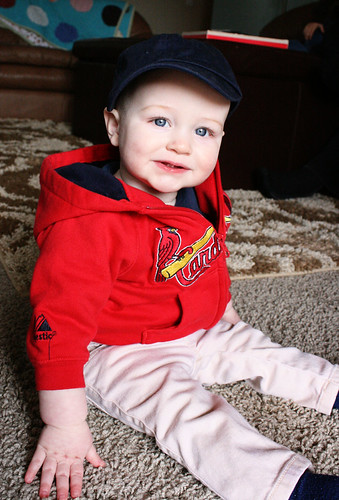
Jack on Saturday
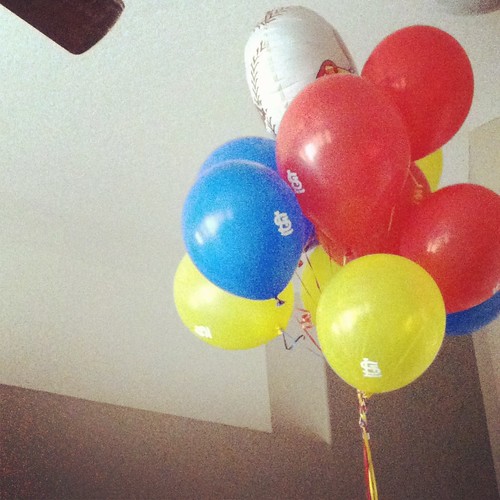
Jackson got to look at his balloons while he was chilling out though.
First we changed it Friday to our house (it was for Saturday) because it looked like it was going to be pretty windy and it was supposed to be at the park. Then when he got sick, we changed it to Sunday after church still at our house and then debated back and forth whether or not just to cancel it, but in the end we had it and are really glad we did.  When we woke up it was raining, (and later hailing),  and we warned everyone ahead of time in case they didn’t want to risk getting anyone sick, and we were surprised of the turn out! Our balloons were dead but Jackson even got surprised with some new ones!
Thank you friends and family who were able to make it (and risk our little sick guy!) and celebrate with us. We love you!
balloons
Here’s our pretty balloons yesterday before they went flat. I did the St Louis Logo on them with vinyl stickers and my cutter
birthday boy in kitchen
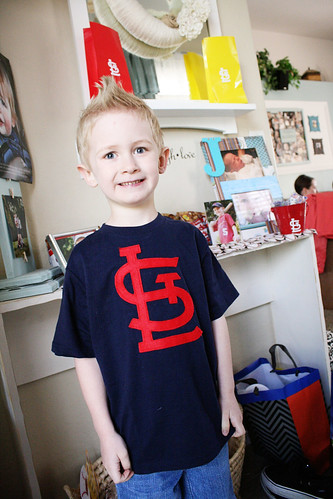
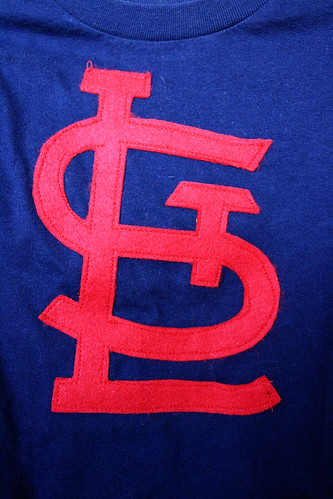
I freezer paper stenciled the back to look like a jersey and I did a felt applique on the front.
birthday boy
birthday boy back logo shirt
bannerbanner2
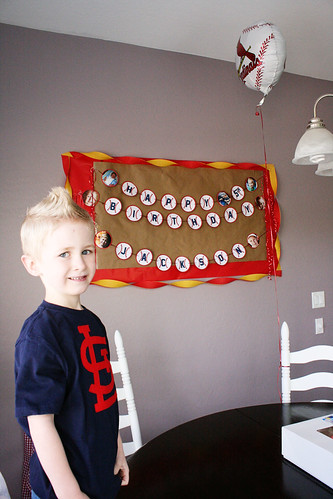
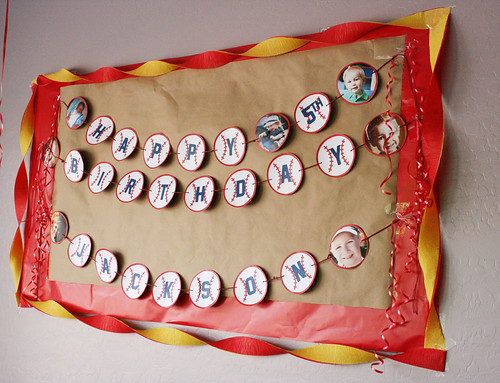
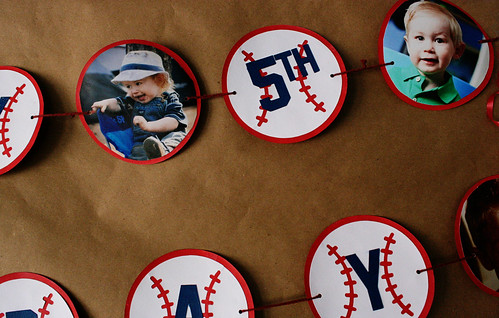
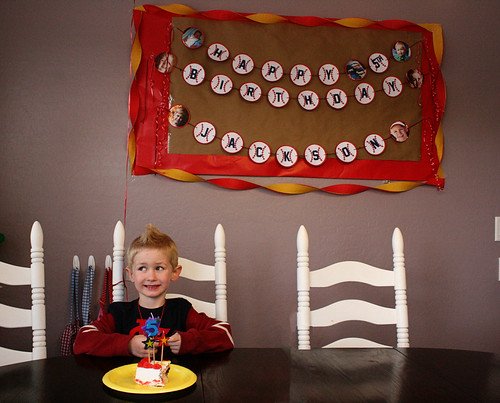
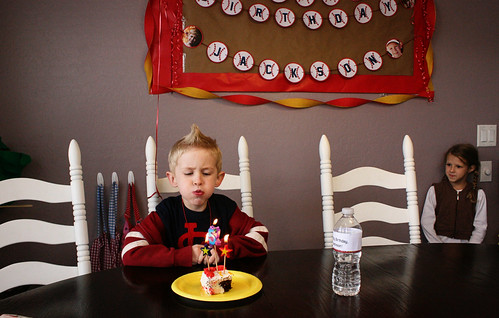
Baby pictures and baseballs made up this birthday banner
cookies2
cookies1
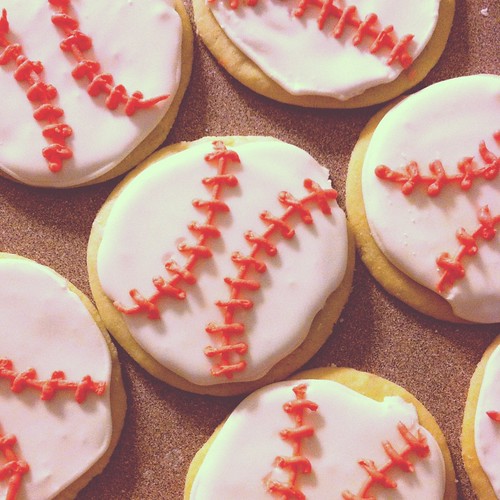
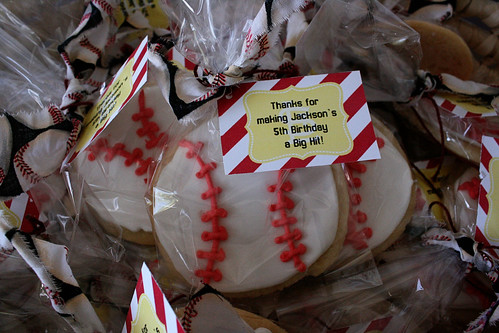
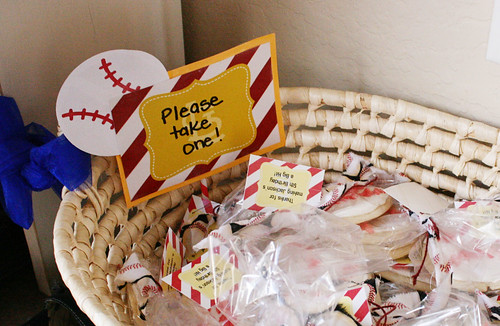
I did the Sugar Cookie Flooding technique on 64 of these bad boys. It took me two days but I think they turned out so nice. Tied with a strip of baseball fabric and a red twine tag on a tag I printed out. They taste good too :)
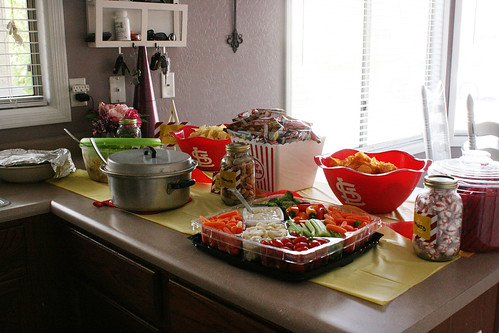
The entry way
entry
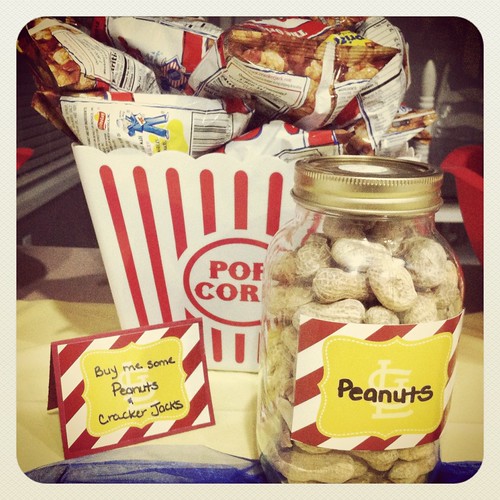
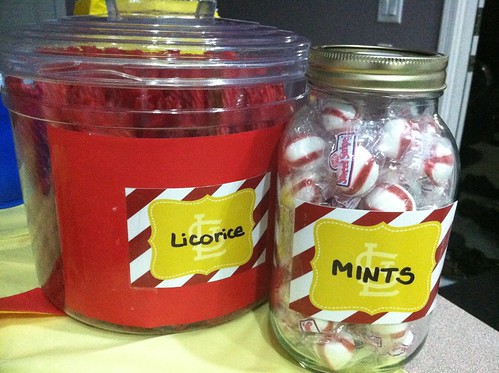
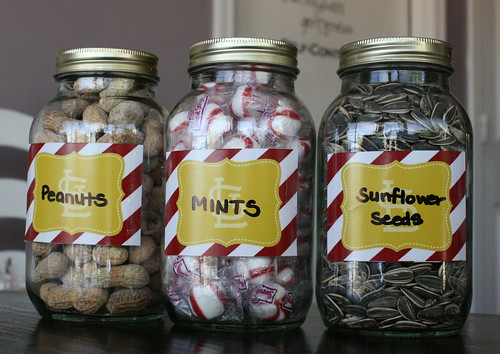
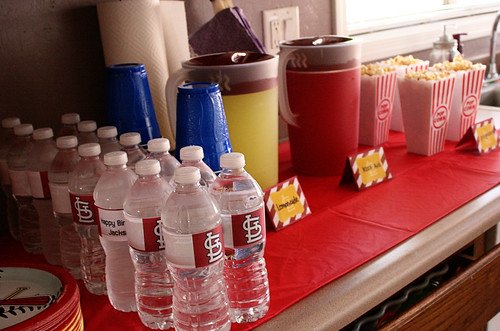
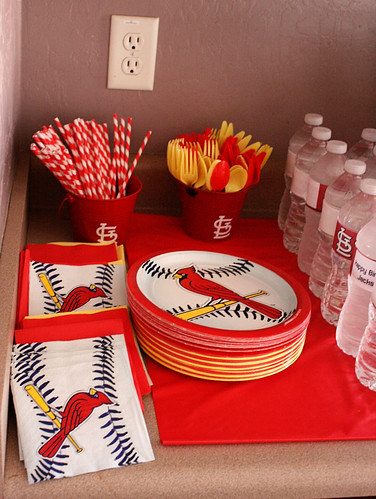
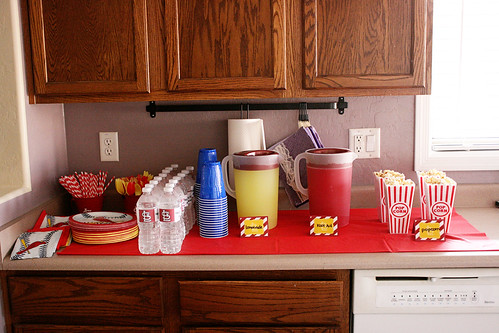
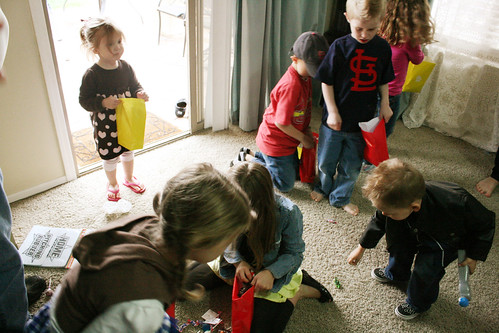
The candy was even “red bird” brand in the bucket. I used current and baby pictures to decorate and threw in some cracker jacks on a baseball print fabric. The red and yellow logo bags were made from the dollar store and some vinyl stickers. They were used as favor bags for the kids and the pinata.
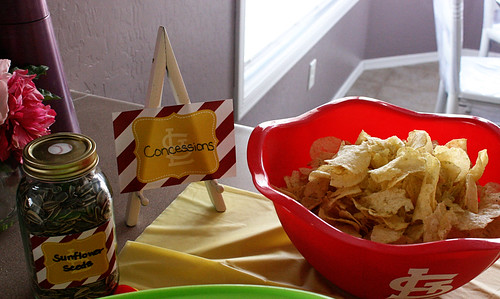
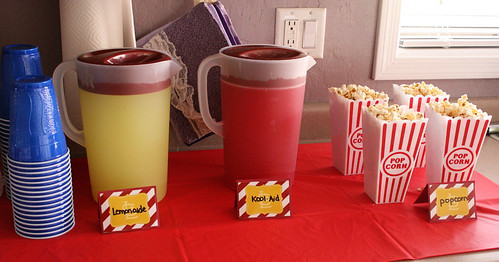
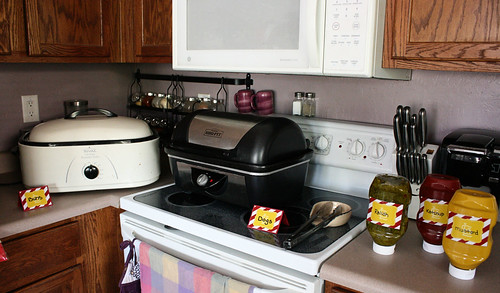
Food pictures:
food
jars
drinks3
drinks2
partyware
drinks
hot dogs
The hot dogs were so easy, we wrapped the buns in foil and put them in to warm and the hot dogs cooked while we were at church. Since we had less than 15 minutes to prepare after walking in from church, I think it was a success!
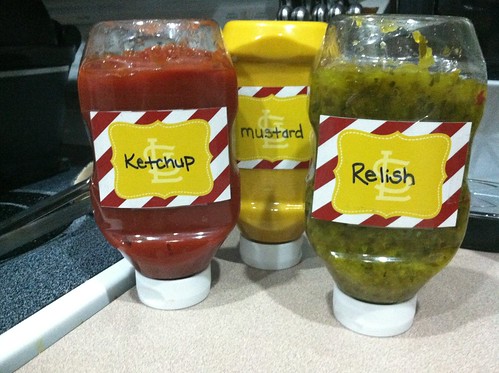
Picnic pack of condiments from Sam’s club
od1
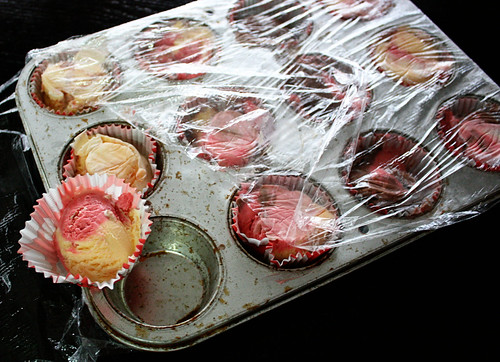
I saw this idea on pinterest and loved it. Cupcake liners (baseball of course) held the ice cream ahead of time for easy serving when it was cake time!
ice cream idea
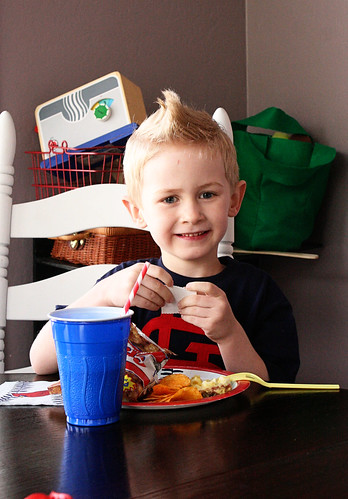
Birthday boy’s meager lunch
birthday boy lunch
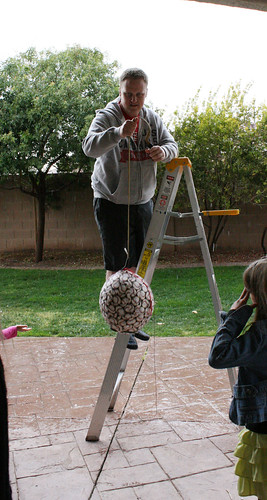
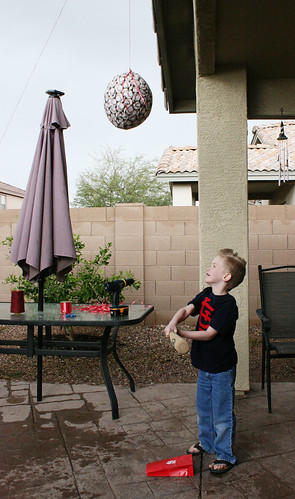
For the pinata, let me just say *an obvious by the way* do not use fabric and mod podge, even if you patch the fabric on. It makes it VERY solid! The kids all had a turn hitting it though :)
chris pinata pinata2 pinata
The crew waiting for their pinata prizes
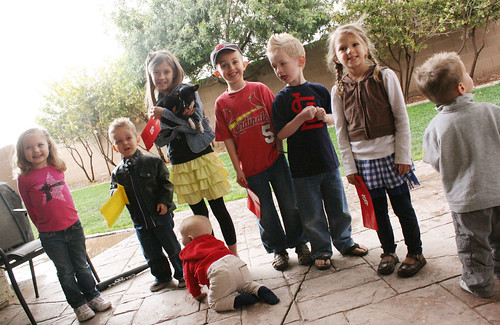
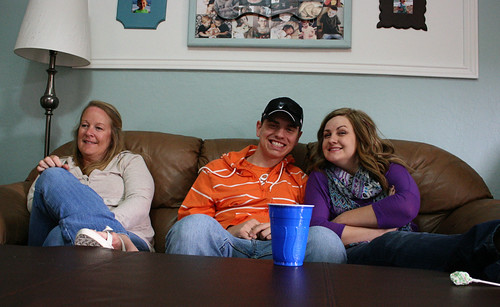
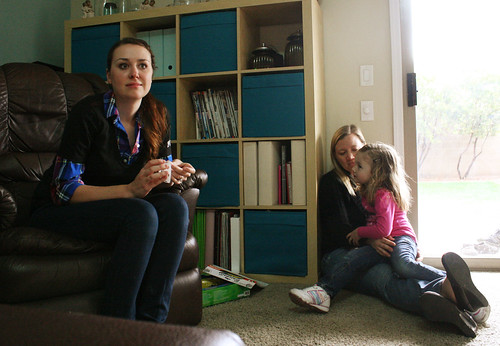
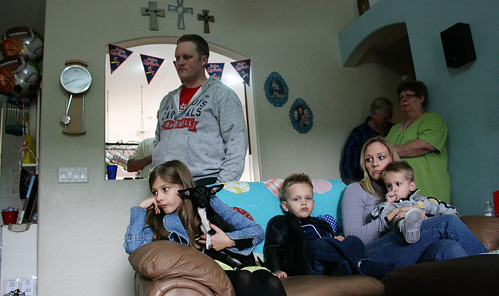
crew
Some party goers :)
everett party goersgifts2 party goers2
Gift opening, with lots of help
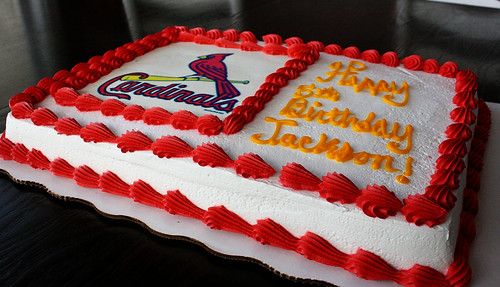
gifts3
gifts1
And cake time!
cake
birthday cake
candles
Category: Uncategorized  Pin It Pin It

LinkWithin

Related Posts with Thumbnails