Friday, December 2, 2011

Super Hero Shirts


My boys love super heroes. Like kinda obsessed a bit. I love good deals. Like kinda obsessed a lot.

I was at Dollar Tree a few months back and picked up a blue shirt that totally screamed "Decorate me!". So I took it home, put it in the "to do" cabinet and moved on.

I knew I wanted to make my middle guy a Captain America shirt with it, but didn't know if I should do an applique or a freezer paper stencil.

Michael's had their felt sheets 5 for a dollar a couple of weeks ago, so I had picked up a nice big stack. I got to thinking that the felt would be a fun applique on the blue shirt and whipped on up really quick!

 I had a wooden star I used for a template and then randomly grabbed some bowls and lids in the kitchen and layered with fusible paper backed web. Sewed each layer on and sewed to the shirt. Super quick!


Which of course woke up the beast to create more. So back to dollar tree I went, picked up 7 more shirts and made 2 sets of 4 super hero shirts to give to my boys for christmas. The whole project (8 shirts) was under 10 dollars and I think thats a great deal compared to buying 1 store bought super hero shirt for more than that!

Make sure to buy a bit bigger and wash and dry them before beginning. They are actually decent quality shirts despite being from the dollar tree, but I am a tad nervous of how they will fit the boys since I wasn't able to try the shirts on them! And of course, colors were limited (I would have loved green and red)!


I washed and dried captain america after it was finished and the felt held up super duper, as you can see in the picture!


Not all of them came together as quickly as the captain america, I suggest just googling whatever logo you like, printing the image and cutting the pieces out to trace.

the other shirts were:

green lantern

avengers

the flash

fantastic four

x men

superman

batman

I can't wait for the boys to see them!

Pin It
Thursday, December 1, 2011

Advent Calendar

For years, I have wanted a really neat advent calendar. I love the idea of the kids getting little treats every day leading up to Christmas. There's something special about the month of December.

This year, we decided after looking around and trying to find a fun idea, to just build something with the stuff we had on hand. Wood scraps, scrapbook paper I had hoarded from a few years ago, muslin, paint from painting the hallway, and wrapping paper all came together to make this advent calendar.


My husband is a pretty handy guy! I showed him a picture of what I was thinking shape wise, then we cut everything out. I lined the back piece with wrapping paper and then as we painted the pieces, he assembled it all. 

I had this scrapbook paper here from a few years ago. I cut each day out and modge podged them onto poker chips I picked up at the thrift store, then glued them onto each compartment. I wanted the title to be seen by the little ones, so I put it toward the top of the shelf rather than the center. 


For the bags, I cut out a piece of muslin, folded it sewed the sides and made a draw string for it, then freezer paper stenciled each day on them in different fonts and colors. 


Each day has little treats, activities and small toys for them to receive as the days draw closer to Christmas. Can't wait to incorporate this into our family traditions!

Pin It
Wednesday, November 30, 2011

Christmas Pajamas

I'm going to be honest here. I am about to go crazy. I have had sick kids nonstop since Saturday, which means I have not had a lot of time whatsoever for myself, not much sleep and minimum outings outside of my home.


Today I had enough of sitting on the couch. I love my babies and I feel bad for them that they don't feel good, but I am just not a couch sitter. I cleaned up the house that was needing it in a desperate way, and made lunch. Just doing those things helped me so much! And how is it the last day of November?!

Anyway, it's no secret that I am a frugal crafter. I love creating things from other things, reusing what we dont need anymore or what other people have gotten rid of. Some people call me cheap, I think of myself as resourceful.

Every year, we give the kids a pair of pajamas on Christmas eve. Just one of those traditions that a lot of people do. There's something about a comfortable pair of pajamas and going to bed all snug and happy!

We have done matching pajamas in the past as well as fun cutesy pajamas (I was even talked into character pajamas last year).


These were my favorite. Look how tiny these boys were!

This year I wanted to go back to the matching pajamas idea and started looking around. Unfortunately, I couldn't really find anything that didnt cost an arm and a leg, that looked good with both genders and that was in all the sizes I needed!

I was at the local thrift store during their half off day and stumbled upon two flannel king size pillow cases. For   50 cents a piece, I bought them, washed them and started playing around.  This was one of those projects that I went in and didn't know what I was doing with everything, or have a vision at all. I just went for it. I figured if I messed up, I was only out a dollar. I love the results!

I honestly didnt expect to get 24 months, 5t, 6 sizes from two pillow cases but it actually worked! I even had enough left over to applique matching shirts and add ruffles to the 24 months pants. I used pants they already had for patterns and the boys' pants had the pillow case edge so I didn't need to hem theirs.


Then I added their names to the pants as well with a simple embroidery thread. I did it free hand but you could use a washable marker to trace.


The appliques were used using this pattern I found on pinterest  I did a simple zig zag stitch around it after I ironed them on with paper backed fusible web.


And shh don't tell, but one of the shirts was a 50 cent yard sale find, one was a hand me down from a sibling and the other I did have to purchase. But since I only put 1.50 into it, I figured a 5 dollar shirt was ok. 6.50 for matching pjs? Works for me!

Can't wait to see them all matchy and snuggly on Christmas morning!

I linked up at these great blogs!

 ThriftyThurs Thrifty Thursday Week 51
Pin It
Monday, November 28, 2011

I miss blogging.

I often struggle with blogging here because I don't ever want to come across as unrealistic or bragging. But because the point of blogging to me is to share ideas as well as help people be inspired like I am often inspired by other bloggers, I have decided that I really honestly enjoy blogging and talking to other bloggers and having fun sharing crafts in the online crafting community!

So baby, I am back!

Which is fun right? Because it's that time of the year that I love crafting the most! Christmas gifts and decorations!

We keep things pretty simple in terms of decorations and gifts, often trying to give as much handmade as we can and have been working a little bit at a time here and there for the past couple of months.

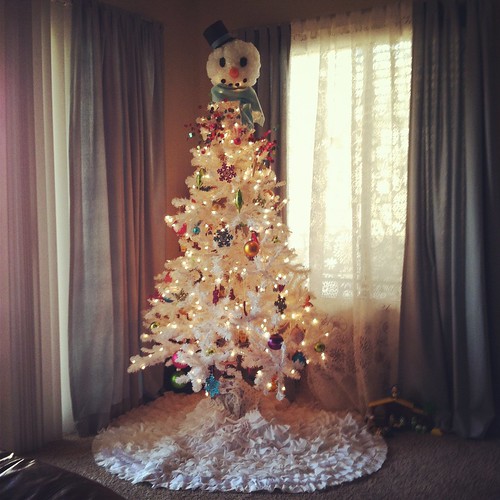
I will leave you with a picture of our simple little tree, complete with some new handmade ornaments I worked on this weekend, the tree skirt inspired from pinterest, and our handmade tree topper we put every year.

all pictures were taken with my phone. just gettin' real with ya.


Pin It
Tuesday, September 27, 2011

Make a dress, any dress!


I have really gotten into a rut with sewing. I use tutorials and patterns I have purchased online, but I hadn't really done anything "on my own" in awhile.

Yesterday, I pulled out a dress that I think looks so comfortable when my daughter wears it, but since she is so tall, it is getting to be short on her long legs!


I traced it, used some basic sewing knowledge to apply to the construction of it, and duplicated it into a new one.


This took probably about half a yard to do, and then I made bais tape from a coordinating brown knit. 

You can do it too! Trace your dress (or tshirt or pants or skirt!) pieces onto paper before cutting into your material. This way you can tweak until the pieces look right. Always give yourself a lot of wiggle room, especially if you are making the outfit bigger than the original. Don't forget your seam allowances!

Then, you can embellish it however you want! Bows, buttons, pockets, ruffles, you name it!


Pin It
Sunday, September 25, 2011

New (to us) Dining Set


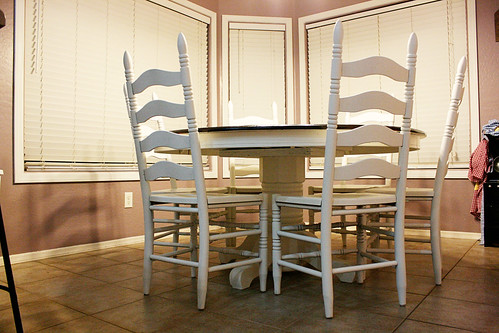
This summer, I have been looking high and low for a new kitchen set. They are so pricey brand new and we had our eye on one, but I still did not really want to spend $$ on that. I was checking craigslist and thrift stores frequently as well, but no luck.  The problem was, our hand-me-down kitchen set was falling apart big time. I would jsut hold my breath when we would have people over, praying that the chairs did not fall apart!
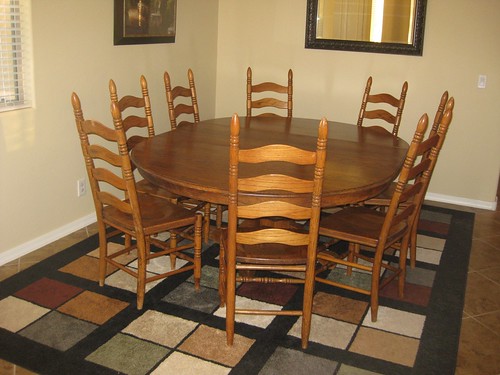
One day, I was at the thrift store and got an email asking if I would be interested in this set:
before
For FREE!
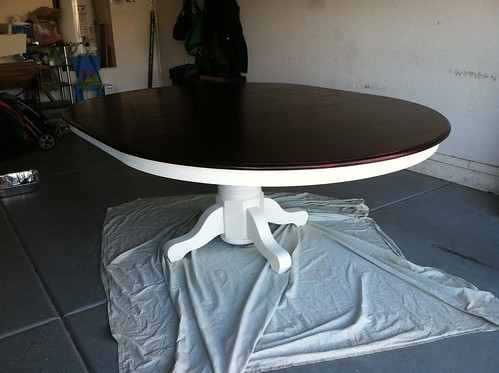
I jumped on it so fast, because this was PERFECT for our family! It has a leaf and seats 8 or without the leaf it seats 6. It is already over 40 years old. It was just God taking care of us once again!  It was destined to go to Goodwill but Goodwill wasnt going to pick it up for a month or two.
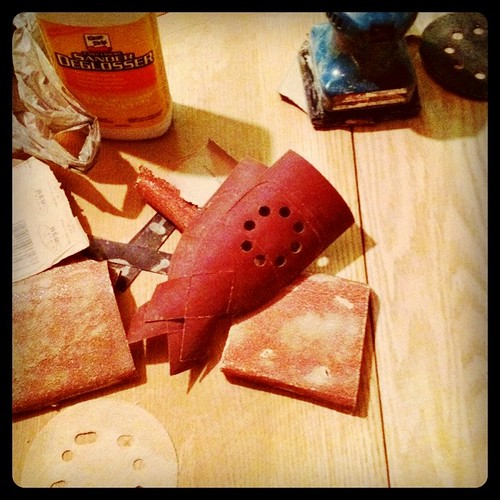
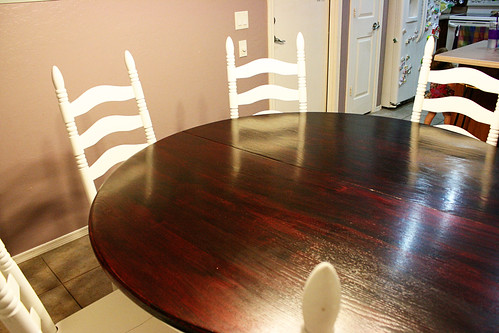
I knew this baby had a lot of potential. I had seen a picture online of a table that looked like the one that we were getting and knew that was exactly what we wanted. So my husband and I worked on it every day for 7 days whenever we would have time, usually in the dark and when the kids were in bed.
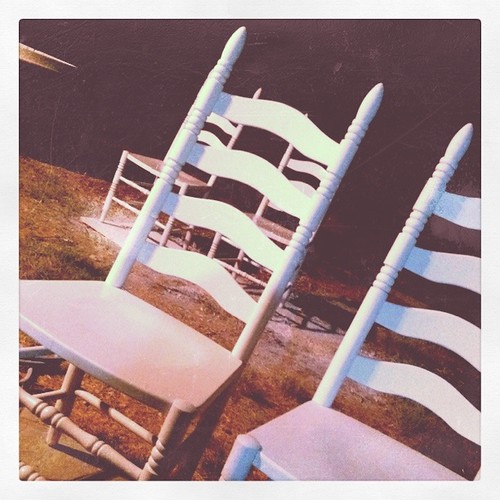
Yesterday, we finished it up. Here it is still in the garage, with the leaf in.
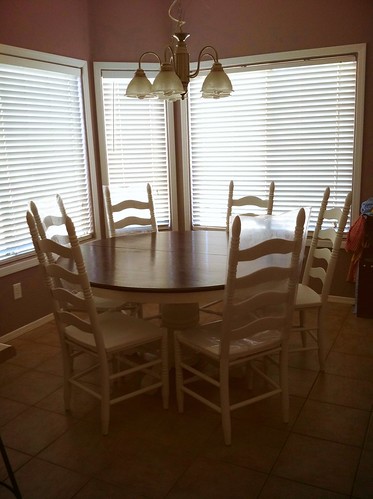
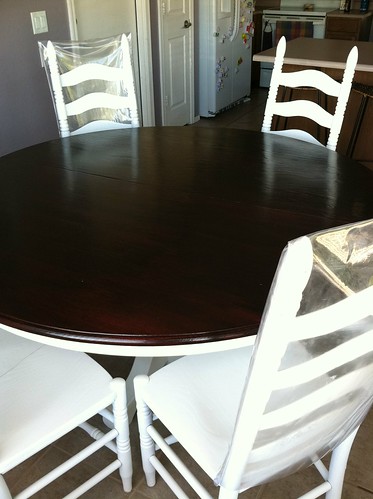
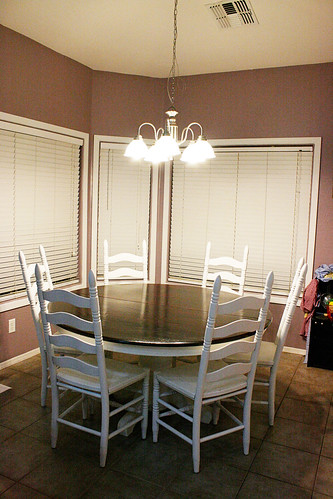
And here it is in the kitchen without the leaf and only 6 chairs!
I kidproofed the chairs with some clear vinyl I sewed covers for. I am still super paranoid though!
table 2 table table 3
We are so grateful for it and I hope it lasts a long long long time! Pin It

Sunday, September 11, 2011

Living Room Update

My husband and I are mutually getting sick of the decor in the living room. We both really like the colors but there are things we would love to change. Like those mirrors on the wall above the couch. Or the couch itself. 


One of the perks that my husband's job has been doing is giving small gift cards here and there that you can choose where to spend them. Usually, he picks Amazon or Lowe’s. They are pretty handy to have and we have even been saving up here and there to buy a new dishwasher once our’s gives out (which we know might be soon).
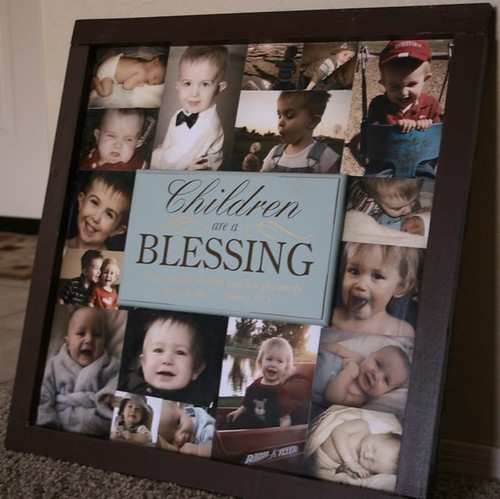
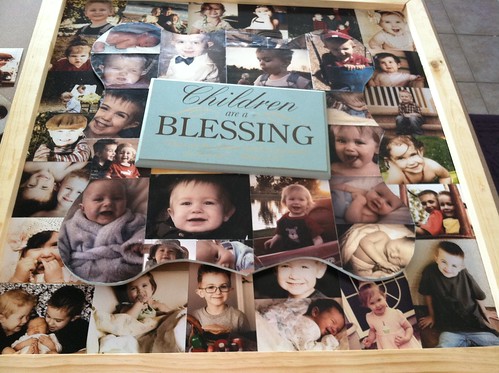
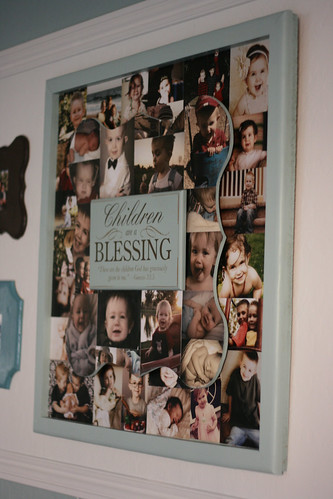
Saturday, I decided on a whim to redo the living room frame of the kids. Ellie has been pointing at that one and the kitchen one and saying everyone, and looking for herself as well. I thought it would be a quick fix to add some new pictures and be done. But if you give Rebecca a a picture, it turns into a collage, which turns into…..a whole new project. And I got a jig saw for my birthday I was dying to put to use. But the cool part about this project is that it cost us nothing to do, and we used a lot of what we had here at home!
Here’s the before: ( This is a very old picture, I need to add pictures of the little entry way by the door. I have changed it up a lot over there!)
wall2
Buh-bye mirrors over couch!
This is the original collage that I was fixing.
mycollage
which turned into a scalloped piece.
which turned into a larger frame of the scalloped piece.
photo
finished collage
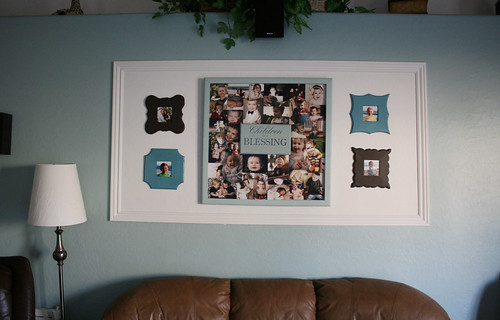
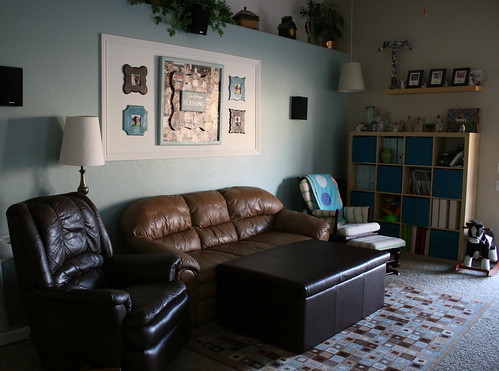
Then we decided to frame it out above the couch.
And then paint it.
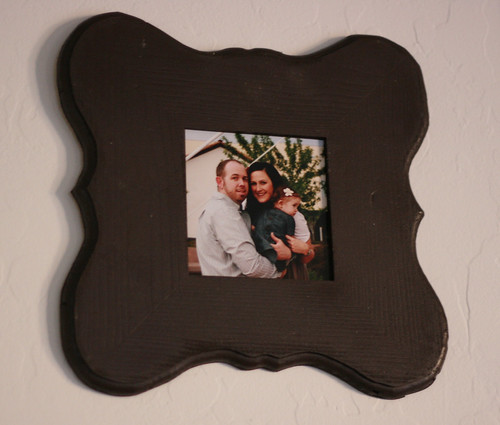
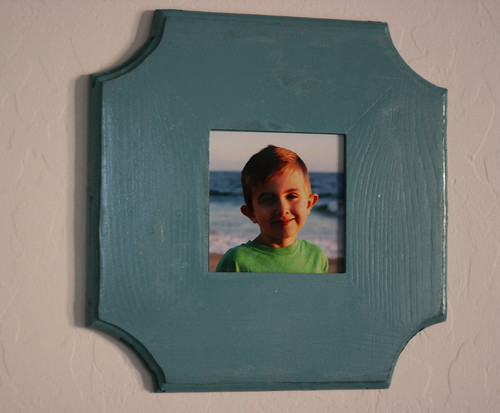
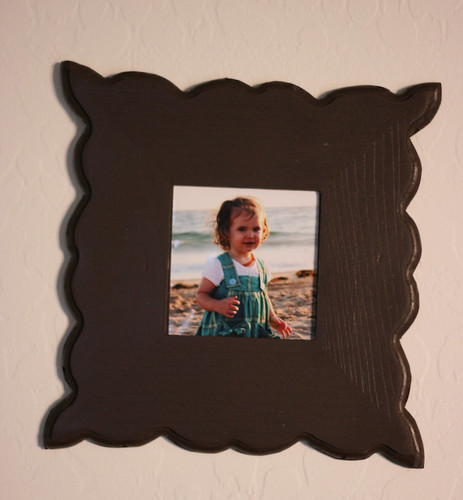
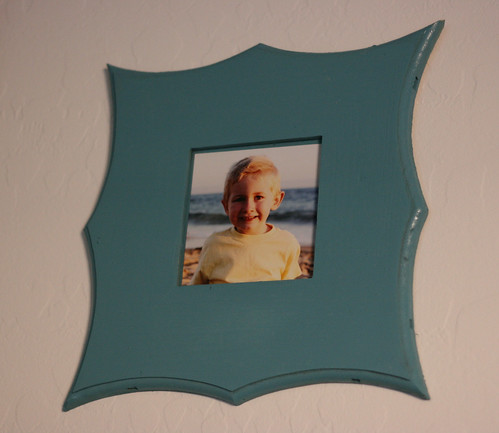
Then take those old ikea mirrors and make new frames. I drew out the shapes and then we cut them out with the jig saw and router-ed the edges and painted them.
us frame
jaden
ellie
jack
Which all turned into this:
frame wall
photo wall 1
It’s hard to really show the details in the pictures, but we are both super happy with it. And Ellie loves standing on the couch looking at all the pictures of….herself.
We also put new feet on our couch just to raise it up (which is cheaper than buying a new couch!) and can tell a difference between that and our love seat (that we still need to do). And now I have an empty wall space in the living room I can add something new to (I have ideas)!
Pin It

Friday, August 5, 2011

Family Art Work


If you follow me on pinterest, did you see this adorable idea fromSamster Mommy's Natasha? She got everyone in her family (including the pets!) and created a beautiful masterpiece!

I have been collecting a couple of things here and there to eventually redo the wall above our couch into more of a gallery type wall. (And by a couple, I mean, I have two frames so far.) I don't want to start it until I can finish it, and it might take awhile to get everything and figure out what I want to do, so I am not rushing it. But i thought this would be a perfect center to the whole thing.

I got everyone together (minus the dog, because it was hard enough to keep a 19 month old's hands contained during this) and we all had a blast creating it together!


(and what art session isn't complete without their nerf guns?)

I already had scrapbooking letters to spell out family, a primed canvas and the acrylic paints on hand. We each took a color that each family member tends to gravitate to, which ended up blended together pretty well! The colors in my living room tend to be a tiffany blue and browns, and I have been wanting to incorporate more whites and greens as well.

I love the gloppy textures, I love that you can not tell they are handprints of every size unless you look at it for awhile, because it just makes a "firework" display as my 4 year old called it. I really like the family as lowercased too on ours. Its just us!

On the back, I wrote our names and the year, everyone's ages and how many years we have been married.


Pin It

LinkWithin

Related Posts with Thumbnails